


Mastering the Herringbone Pattern: Step-by-Step Layout Tips
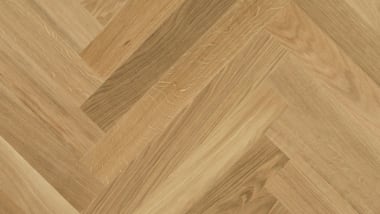
The herringbone pattern has become a hallmark of sophisticated interiors. Its distinct, V-shaped arrangement of rectangular planks brings dynamic texture and movement to any room. But if you're wondering how to lay out a herringbone pattern correctly, you're not alone precision is key. Whether you're a homeowner tackling a DIY project or a design professional aiming to perfect the visual flow of a space, this guide will walk you through each step for flawless execution.
Why Choose Herringbone?
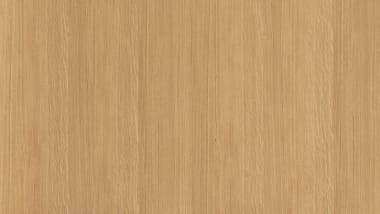
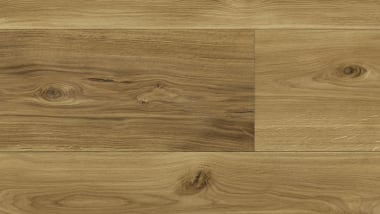
Herringbone flooring is timeless, bold, and elegant without being overwhelming. Unlike standard plank arrangements, herringbone patterns inject visual interest and sophistication into both modern and traditional interiors. At Havwoods, our Cedro Character 120mm Herringbone exemplifies this aesthetic with warm honey tones and durable engineered European oak perfect for elevating residential or commercial spaces.
Preparation: Set Yourself Up for Success
Choose the Right Material
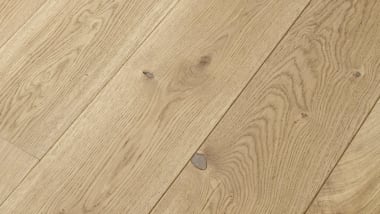
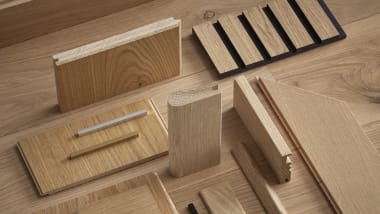
First, select engineered wood flooring that’s cut for herringbone installation. Boards like Havwoods' Cedro Herringbone come with precision-milled tongue-and-groove edges to make laying easier and ensure long-lasting alignment.
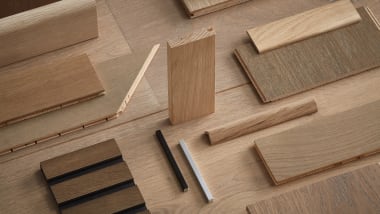
Gather Tools and Materials
You'll need:
1. T-square or chalk line
2. Flooring spacers
3. Underlayment (if needed)
4. Adhesive (for glue-down installations)
5. Rubber mallet
6. Flooring nailer or stapler
7. Saw for edge cuts
8. Tape measure and pencil
Let the Wood Acclimate
Like all wood floors, your planks should acclimate to the room’s temperature and humidity for at least 48 hours before installation. This prevents gapping or warping down the line.
Step-by-Step Guide: How to Lay Out a Herringbone Pattern
Step 1: Find Your Center Point
Start by determining the exact center of the room. Snap a chalk line or use a laser level to create a perfect perpendicular reference line. This line will act as the spine from which your herringbone pattern grows.
Pro Tip: Rooms are rarely perfectly square. Always measure from multiple points to ensure symmetry. The herringbone pattern is unforgiving to even the slightest misalignments.
Step 2: Dry Lay Your First Row
Position the first two planks at a 90-degree angle to each other to form the "V" of your herringbone. Make sure their meeting point sits exactly at the center line. Continue laying several rows without adhesive to visualize the pattern.
Dry laying lets you spot mistakes early and adjust before it’s too late.

Step 3: Apply Adhesive and Set First Planks
Once you’re confident in the layout, lift the initial planks and apply flooring adhesive. Carefully replace the boards and press firmly. Use a tapping block or rubber mallet to ensure tight joints.
Work in small sections to prevent the glue from drying out before boards are set.
Step 4: Build the Pattern Outwards
Continue laying planks in the herringbone formation, alternating the direction as you move outward from the center. Use spacers to maintain expansion gaps along walls.
Maintain consistency by checking every few rows with your chalk line.
Step 5: Cut to Fit Edges
As you reach the perimeter of the room, you’ll need to cut planks to fit. Use a circular saw or jigsaw for accuracy. Don’t forget to factor in skirting boards or transition strips when making these cuts.
Step 6: Roll and Clean
Once the floor is laid, roll over it with a 100 lb. roller to ensure the adhesive bonds fully. Wipe away any excess glue immediately with a damp cloth.
Let the adhesive cure for at least 24 hours before walking on the floor or moving furniture in.
Tips for Achieving a Polished Look
Use High-Quality Engineered Planks
Herringbone patterns place higher stress on plank alignment than standard layouts. Havwoods’ engineered woods, like the Blanco Character Herringbone or Mentone Character, are specifically cut to maintain uniformity and stability.
Consider the Room's Light Source
Lay the pattern so that the points of the herringbone “V” face toward the primary source of natural light. This orientation enhances the three-dimensional look of the pattern.
Match Patterns Across Adjoining Rooms
If laying herringbone through multiple connected spaces, consider continuing the pattern seamlessly across thresholds. This technique creates a cohesive, high-end look that flows throughout the home.
Common Mistakes to Avoid
Skipping the dry lay: Always preview the layout before committing.
Mismatching grain direction: Ensure boards follow the same grain pattern for consistency.
Neglecting expansion gaps: Wood expands and contracts with climate changes. Expansion gaps are essential.
Forgetting underlayment: Especially important for noise reduction and moisture protection in multi-level homes.
Herringbone Layout Variations
While the 90-degree angle is standard, herringbone can also be laid at 45 degrees for a sleeker, more contemporary vibe. You can also consider double herringbone or diagonal layouts for a custom design.
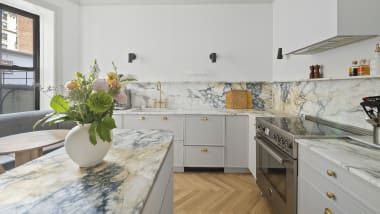
Ideal Rooms for Herringbone Flooring
The herringbone pattern suits spaces where you want to make a statement. Great options include:
1. Entryways
2. Dining rooms
3. Living rooms
4. Master bedrooms
5. Boutique retail or hospitality spaces
For smaller rooms, consider narrower boards like the Cedro 120mm, which maintain visual proportion without overwhelming the space.
Why Choose Havwoods for Your Herringbone Flooring?
At Havwoods, we offer a curated collection of high-performance engineered wood floors crafted specifically for creative layout styles like herringbone. Our woods come pre-finished in a variety of tones, from warm honey to platinum blondes, and are ready for immediate installation.
Plus, with next-day delivery on popular items like the Cedro Character 120mm Herringbone, you don’t have to wait to bring your design vision to life.
Final Thoughts
Laying out a herringbone pattern isn’t difficult but it is detailed. With the right preparation, premium materials, and a step-by-step approach, anyone can transform a room with this timeless design. Whether you're a seasoned installer or diving into your first project, precision and patience are your best allies.
Looking to get started? Order samples from Havwoods or schedule a consultation with our design experts. Let’s bring your floors to life one perfectly angled plank at a time.